I have been working on a new tutorial for a cast-on method that I use on several of the designs in my forthcoming book. It can be used for toe-up socks or tubes of knitting, such as a band on a hat or cuff of a glove.

A toe-up sock
Toe-up socks are one of my favourite things to knit. I love that I can try the socks on as I go, there is no grafting of toes needed and you can use all of the available yarn for the leg. To start knitting the toe I prefer a cast-on that allows me to begin knitting in the round straight away. I use the fantastic Judy's Magic Cast-On developed by Judy Becker with a variation.
With Judy's magic cast-on method the stitches on one needle end up with the wrong 'leg' of the stitch in front, meaning these stitches are twisted if knitted normally, or have to be corrected by knitting through the back loop. My variation means that all stitch 'legs' are the right way round and avoids the twisting.
You will need a circular needle or two double pointed needles to begin.
To start, have a tail of yarn that is long enough to make all the stitches on one needle and a tail to weave in once finished knitting. Hold both needles together and drape the tail of yarn over the back needle. This forms the first stitch on the back needle.

I put my left index finger and thumb between the two strands of yarn and hold the rest of the yarn out of the way with my left middle, ring and pinky finger.
1) To make the first stitch on the front needle I bring index finger yarn under the front needle, over the top of it and then down between the two needles.


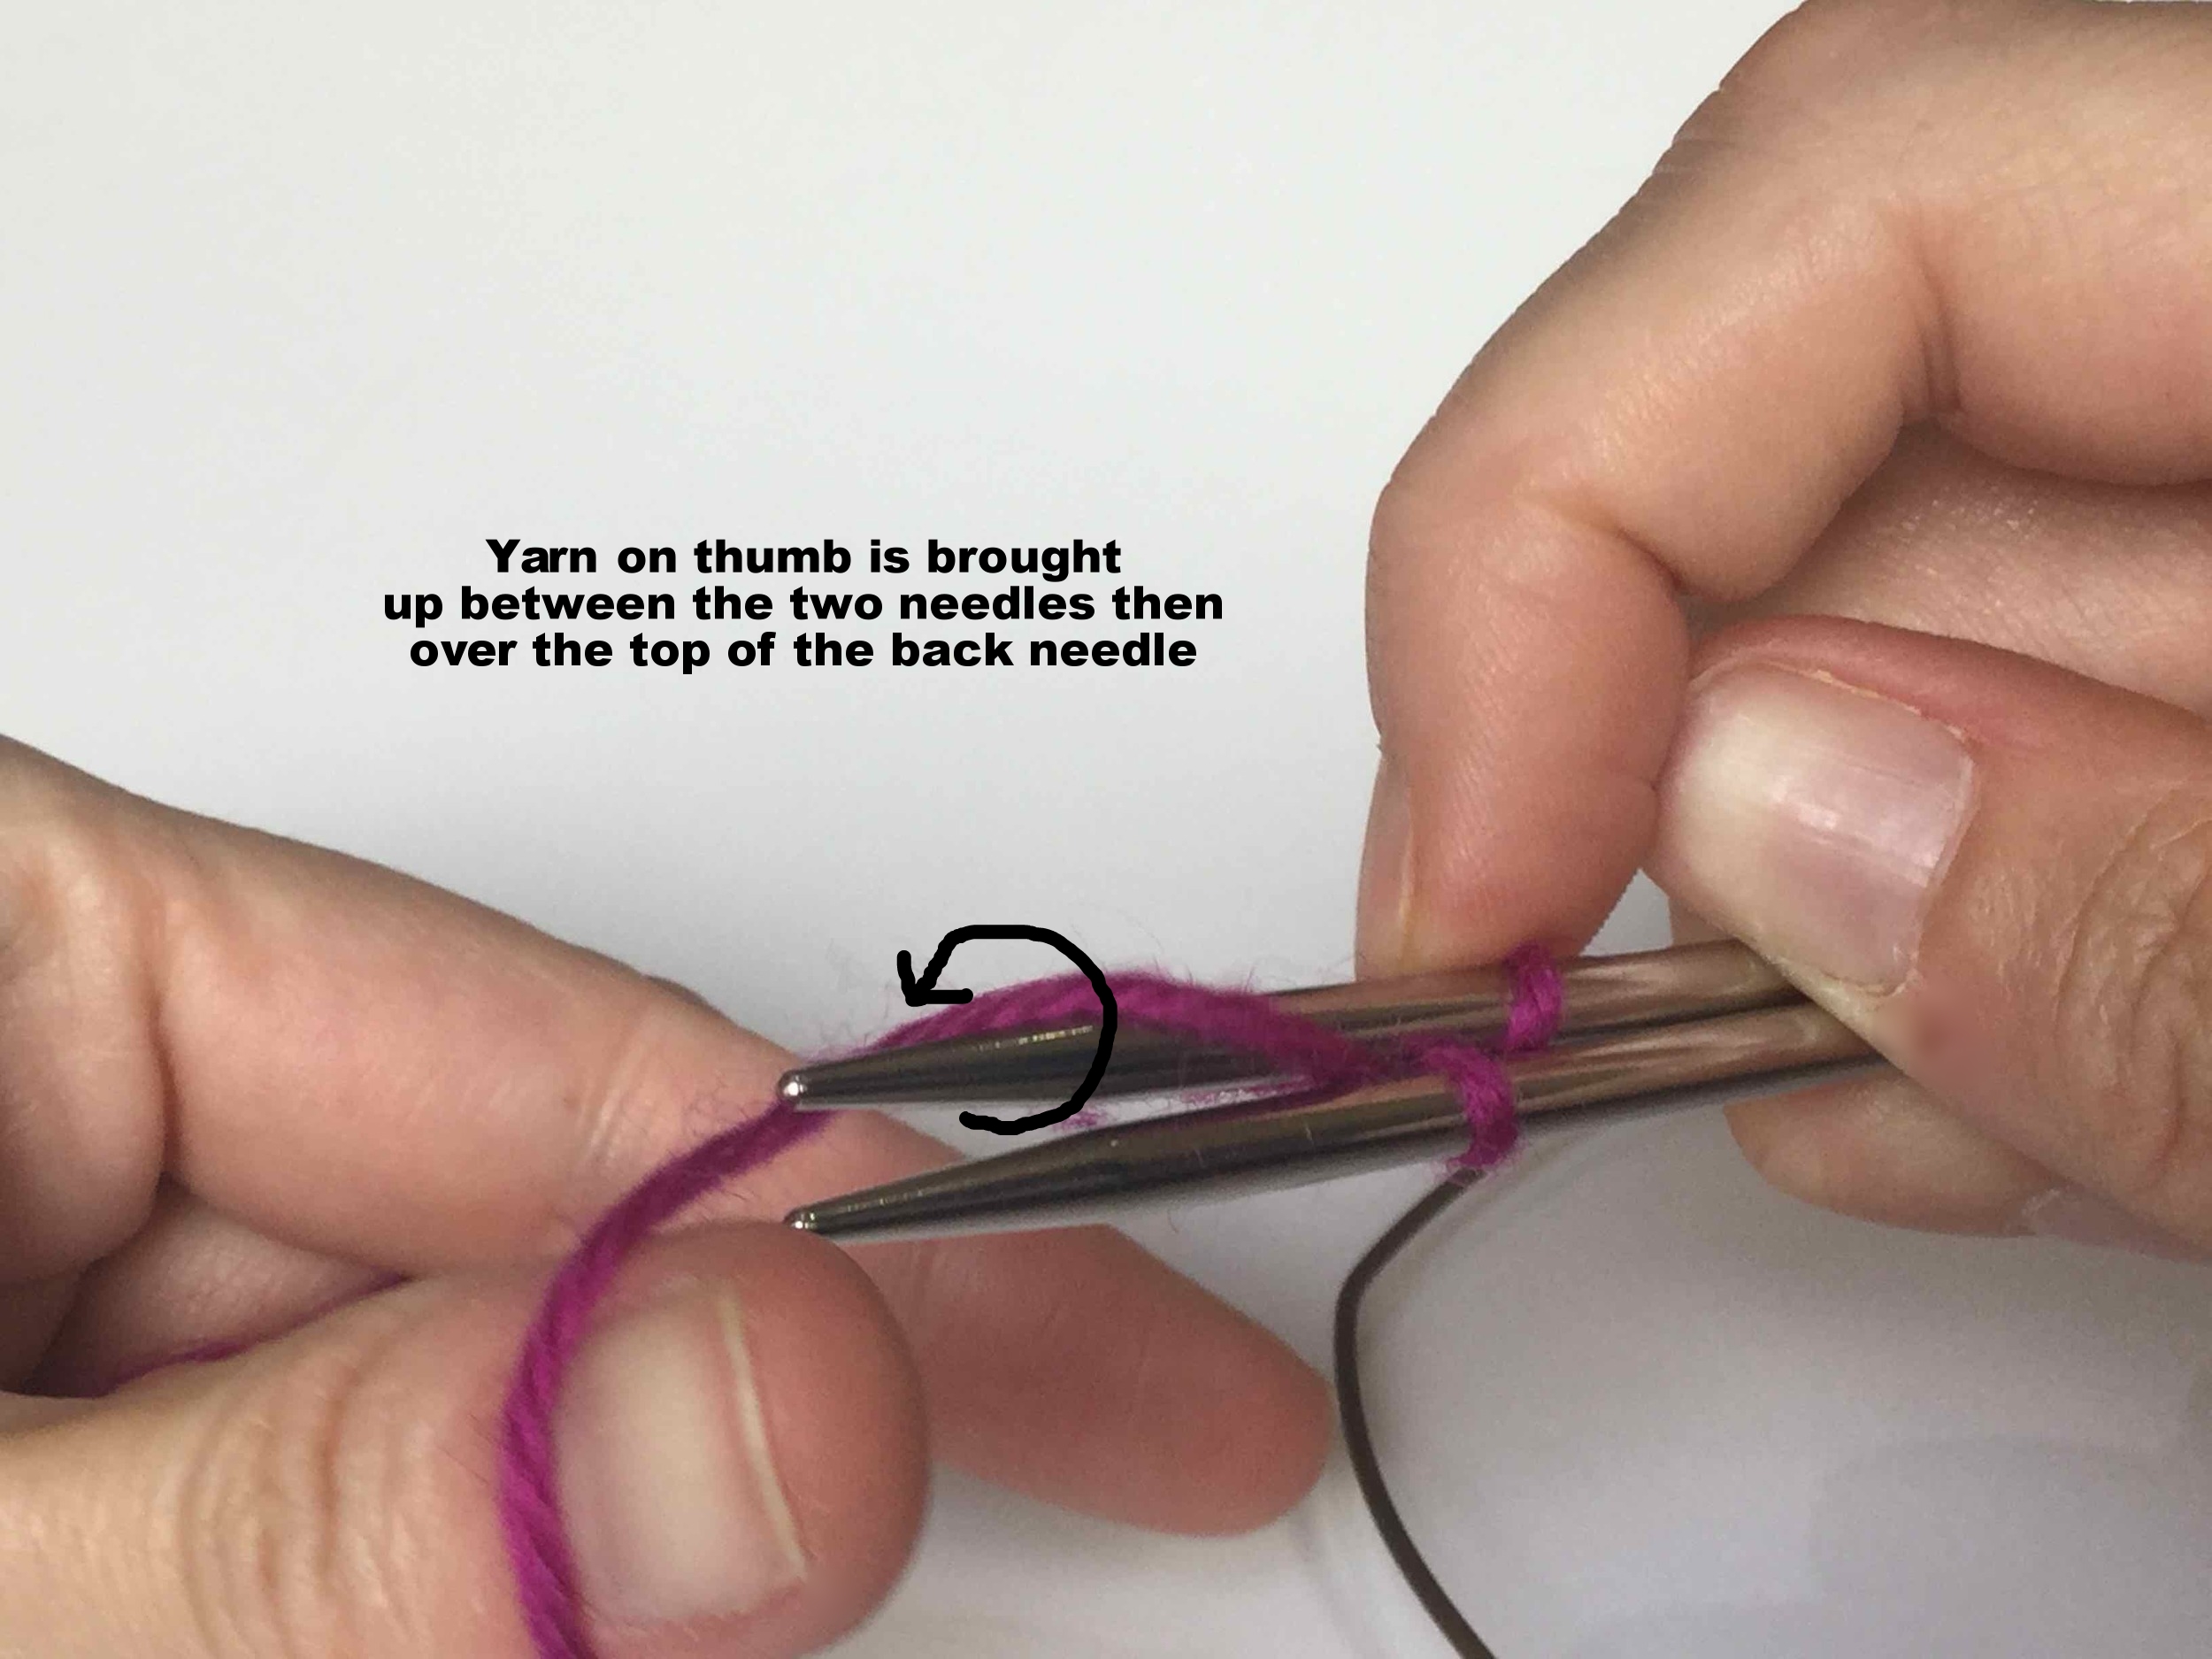
2) To make the second stitch on the back needle I bring the thumb yarn up between the two needles and over the top of the back needle.
3) To make the second stitch on the front needle I bring index finger yarn under the front needle, over the top of it and then down between the two needles.

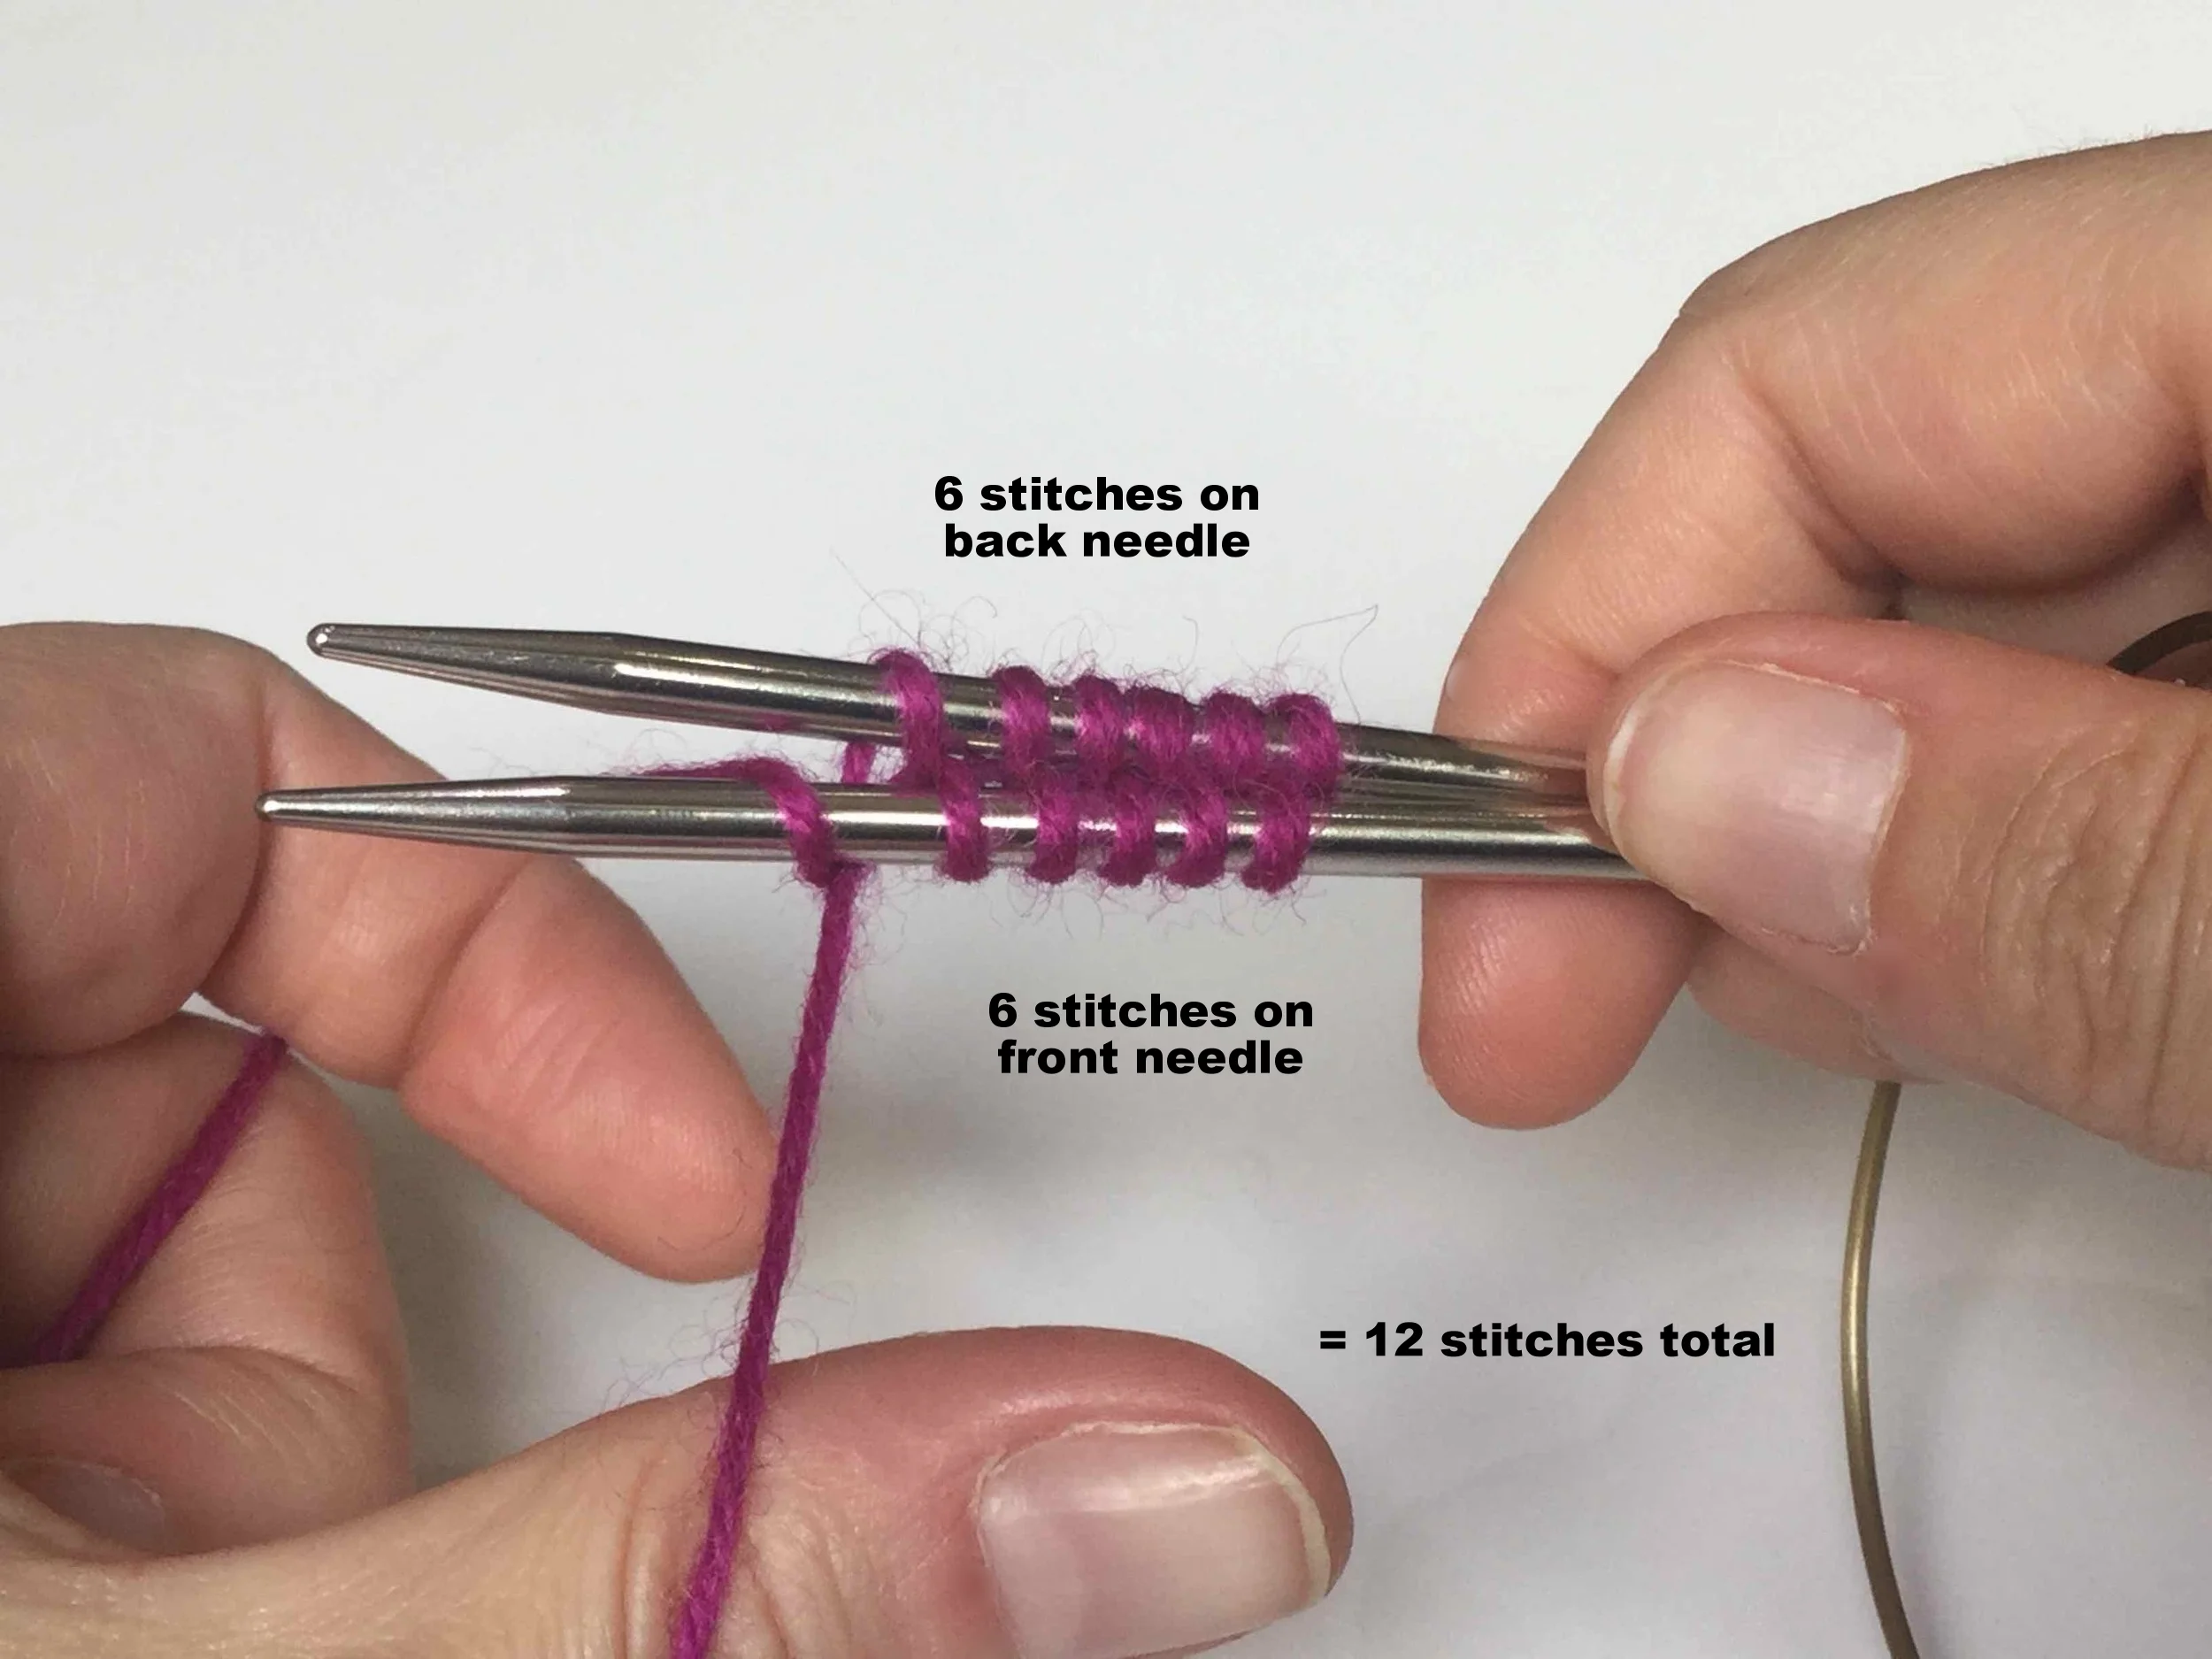
Repeat steps 2 and 3 until the required number of stitches are on each needle.
To finish off, wrap the tail of the yarn over the yarn attached to the ball (working yarn) to secure the last stitch.

The wrong side of the knitting has the purl bumps.

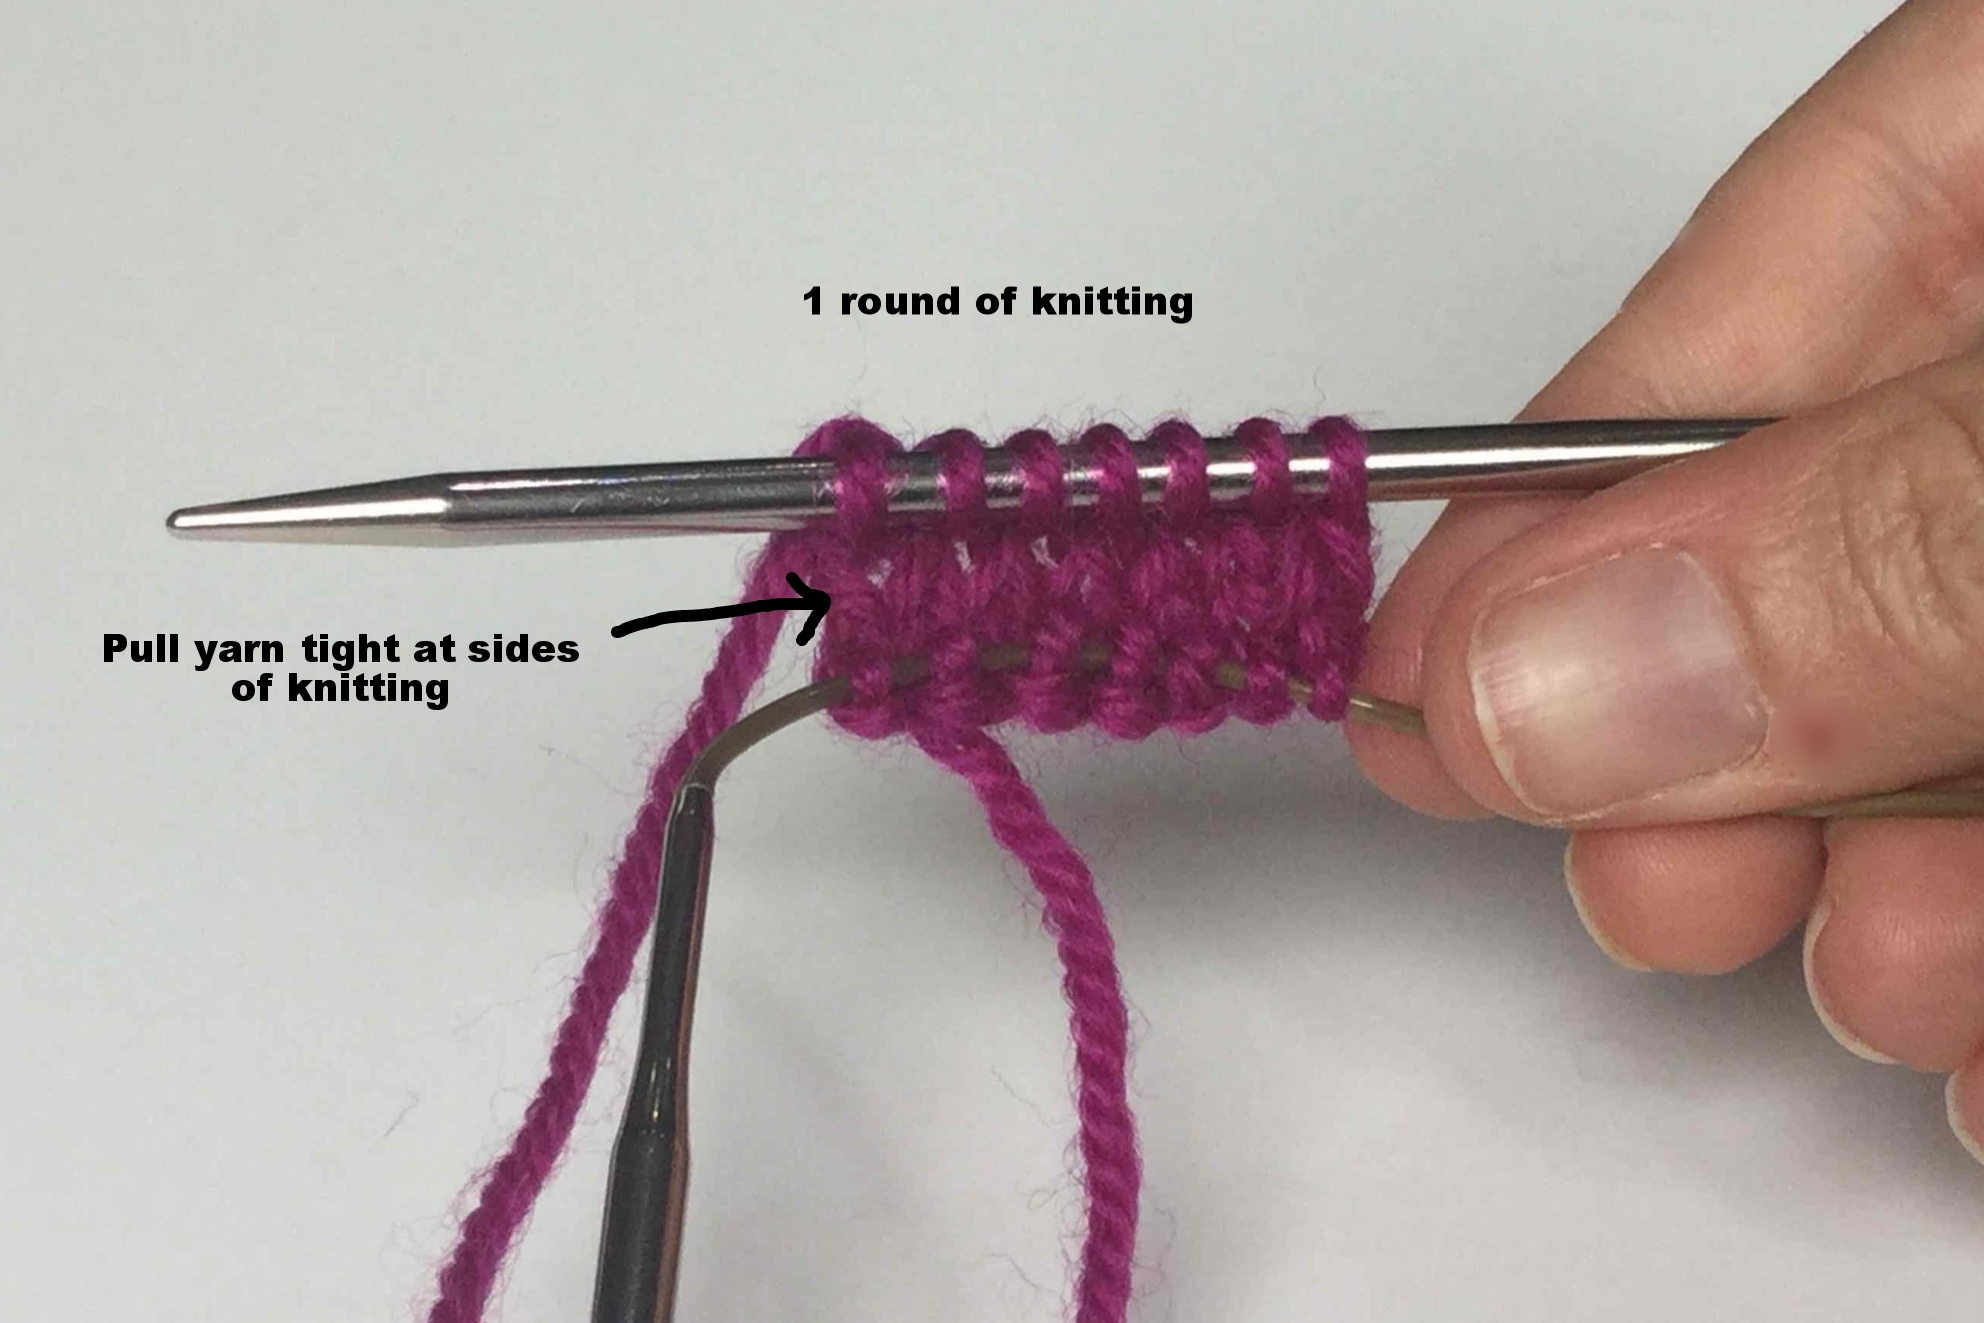
Transfer the needles to the left hand and knit along the top row of stitches. When you get to the end of the row, turn the knitting upside down and knit along what was the bottom row of stitches, pulling the yarn tight at the side. This is one round of knitting.
Keep knitting round as the pattern describes. For toe-up socks this might be with increases at either side, or for a hat band the stitch numbers may stay the same.
I have also made a video of the technique and this can be viewed below or on my YouTube channel.
Happy knitting!